


How do you calibrate your monitor in Windows 10?
Calibrate monitor in Windows 10 in 6 steps

Our tip is to calibrate your monitor once a month with intensive use, like photography or videography.
- Step 1. Go to Display settings
- Step 2. Set the right gamma values
- Step 3. Set the right brightness
- Step 4. Set the right contrast ratio
- Step 5. Set the right color levels
- Step 6. Confirm your current settings
Step 1: go to Display settings
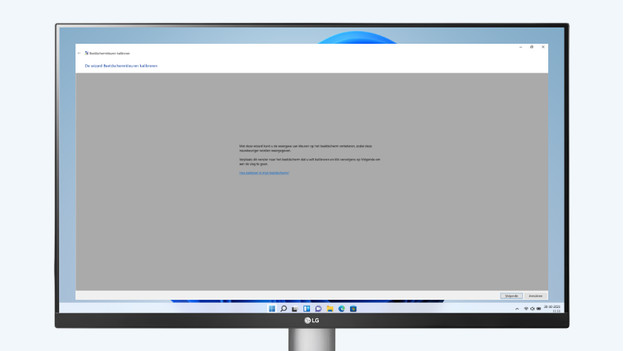
Before you get to work, it's important that the monitor has been on for at least 30 minutes. That way, the monitor is warmed up well. Right click on your mouse and go to 'Display settings'. Scroll down and choose 'Advanced display settings'. Here, choose 'Color calibration' and then select 'Next'. Move this screen to the monitor you want to calibrate. Another way to get here is via the search function in your taskbar. Type 'calibrate' in there and select the first options.
Step 2: set the right gamma values
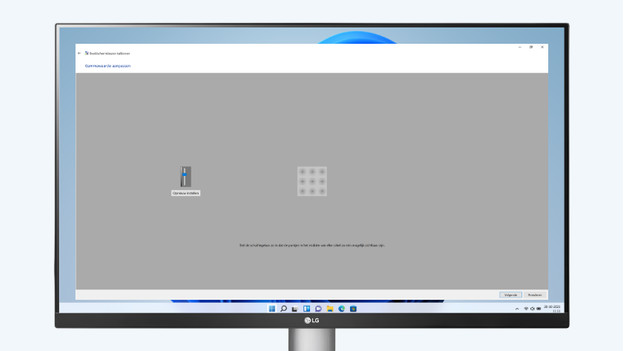
The gamma correction adjusts the colors so an image looks more realistic. A gamma correction that's too high or low warps the colors and shadows. Move the cursor to find the right balance between gamma values. When the gamma values are too high, the gray area is too bright, and the white dots are too visible when the gamma values are too low. You've found the right balance when the dots in the middle aren't visible, and the gray backdrop is half-visible. Found the right settings? Select 'Next'.
Step 3: set the right brightness
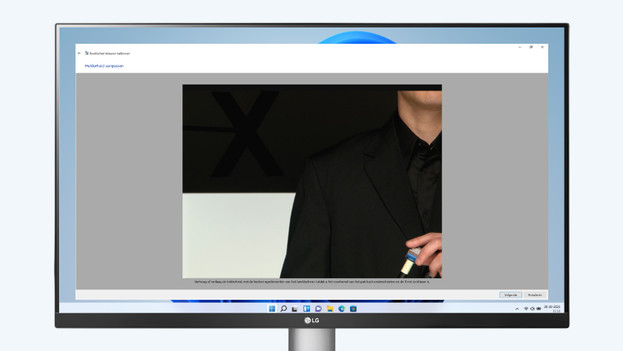
The brightness of a monitor doesn't just decide how bright the screen is, but also influences the color representation on your monitor. The calibration program shows you 3 photos to set the right brightness. For the best result, the 'X' in the background should be visible, but not stand out. In addition, the man's suit should show details without fading. Use the buttons on your monitor to increase or reduce the brightness. Don't have buttons on your monitor? Skip this step. Found the right level? Select 'Next'.
Step 4: set the right contrast ratio
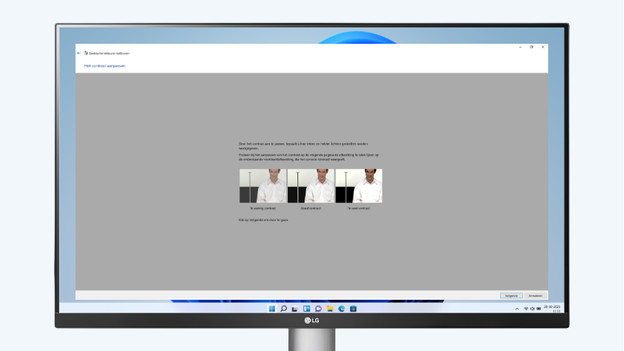
The contrast ratio indicates the difference between the whitest white and the blackest black. When the value is too low, colors look dull. And if the value is too high, black and white are overpowering. Just like with the brightness, you set the contrast with the buttons on your monitor. The contrast ratio is often under the heading 'Color'. Try to find a balance between vibrant colors that don't overpower each other here. If you don't have buttons on your monitor, you can skip this step just like you did with brightness. Done? Select 'Next'.
Step 5: set the right color levels
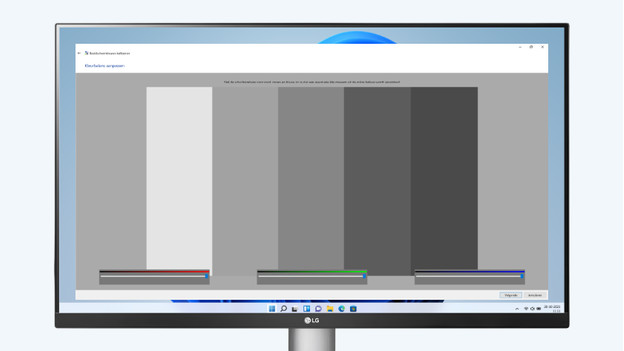
Lastly, you set the right color levels. These consist of the 3 basic colors, red, green, and blue. The right level is when all colors are at the same level. This gives the screen a gray color, without extra shades. This prevents an overpowering color that distorts the display. Are the bars on the screen gray?Select 'Next'.
Step 6: confirm or restore your current settings

Now that you've adjusted all the settings, the screen shows the image with the new settings. The software will now ask you whether you're happy with the changes, or if you'd like to go back to the old settings. Only when you press 'Current calibration', the screen will save the settings. When you select 'Previous calibration', the screen will restore the previous settings automatically.
Calibrate your monitor with a calibration system
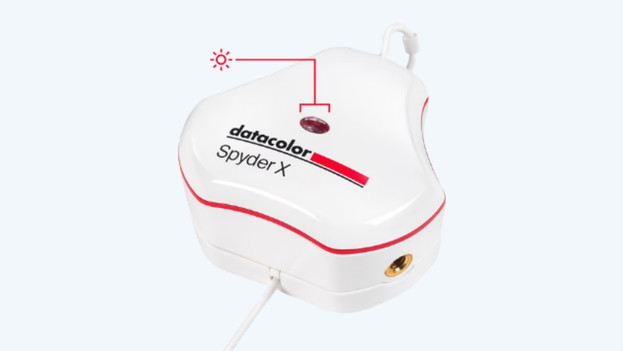
A calibration system, like that of Spyder, performs extra reliable readings. This is very useful for professional photographers or visual designers, for example. The software program DataColor from Spyder works out the exact values based on your screen. A monitor with 98% coverage within the sRGB profile needs a different calibration than a monitor with 94% coverage within the DCI-P3 profile. Follow the instructions that the calibration program shows you, adjust the settings, and then save the new settings.

