How do you solve sound problems with your Astro headset?
Solve your Astro headset sound problems

Adjust the settings of your headset correctly. Follow the 4 tips below and solve audio problems with your headset.
Tip 1. Solve hardware problems
Tip 2. Troubleshoot
Tip 3. Adjust audio settings
Tip 1: solve hardware problems

First, check if there's a problem with the hardware. Connect your Razer headset to a different audio connector in your device. Connect the headset to a different device to test if the headset works. If the headset doesn't play audio on the other device either, it's likely that the headset is damaged. If the hardware works properly, it may be caused by the audio settings. We'll discuss this tip below.
Tip 2: troubleshoot

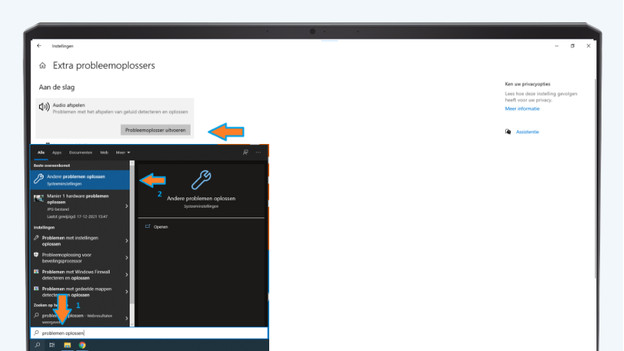
With the Windows troubleshooter for audio, you can easily solve audio problems. Via these 3 steps, you can easily troubleshoot.
-
Type 'troubleshoot' in the Windows search bar, and click 'Additional troubleshooters'.
-
Click 'Play audio'. Then, click 'Run the troubleshooter'.
-
Follow the instructions on your screen to solve the problems found.
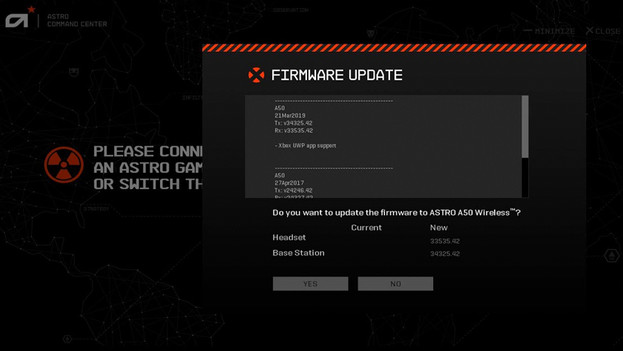
If your Astro headset still won't produce audio, go to the next solution below.
Tip 3: adjust the sound settings

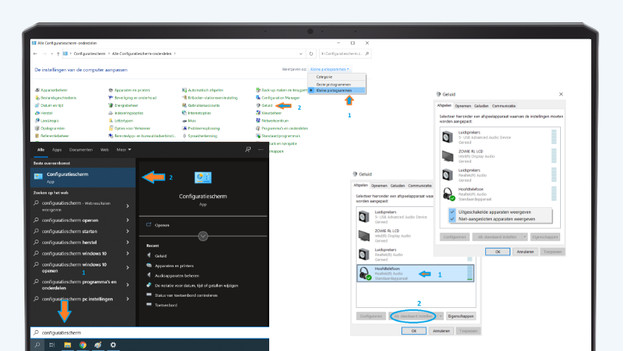
Set up your Astro headset as the default playback device. If you don't, it's possible the sound won't come out of your headset. Follow the instructions below to check and adjust your sound settings.
-
Type 'control panel' in the Windows search bar and click 'Control panel'.
-
Select 'Small icons' next to 'View by', and click 'Sound'.
-
Right click an empty space and check 'Show disabled devices'.
-
Make sure your Razer headset is enabled. If that's not the case, right click it and click 'Enable'.
-
Next, click your Razer headset. Then click 'Set as default'.
Now that you've chosen the right settings, the Astro gaming headset should work correctly.


