Written by Marloes
Edited on
12 March 2024
·
16:01
How do you set up a radial arm saw?
Whether you're going to make furniture from scaffolding wood or lay a beautiful new laminate floor, you'll get the job done with your radial arm saw. But before you can cut anything with the saw blade, you have to set the radial arm saw. That way, you prevent making sloppy cuts. In this article, you can read how to set up the radial arm saw.

Place the radial arm saw stable
It's important that the sawing machine is straight before you start sawing. Use a steel square to ensure the sawing machine is placed at the right angle relative to the surface. Tighten the screws or clamp the radial arm saw to the surface, if necessary. If the saw head is straight and not tilted to the left or right, the angle scale show 0°. If that's not the case, adjust the pointer to 0°.

Adjust the saw blade
You've selected the correct saw blade for the type of sawing that you are going to perform. As a rule of thumb, the more teeth on the saw blade, the finer the cut. Now, you have to set the ideal depth. Adjust the saw blade so that there are at least 3 to 5 teeth in the material while you cut. This way, you can make clean cuts. It's also the safest way to work.
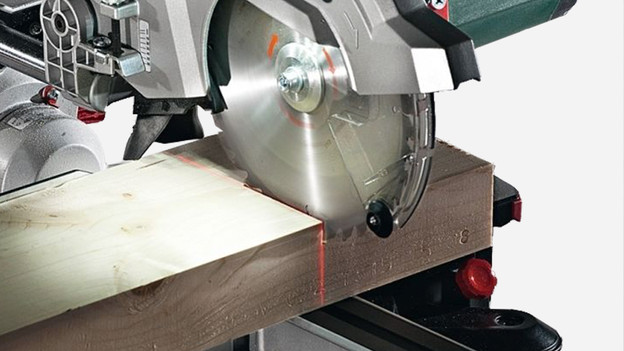
Make sure you set the laser guide or shadow line correctly
A laser guide or shadow line is an extra function of a radial arm saw, which allows you to neatly cut the planned line with the saw blade. For it to work, you have to set it perfectly. Only do this after you've set the radial arm saw, don't assume the laser is set properly when you take the radial arm saw out of the packaging. If the radial arm saw is at the perfect angle, you can position the laser guide so it marks the saw line correctly.
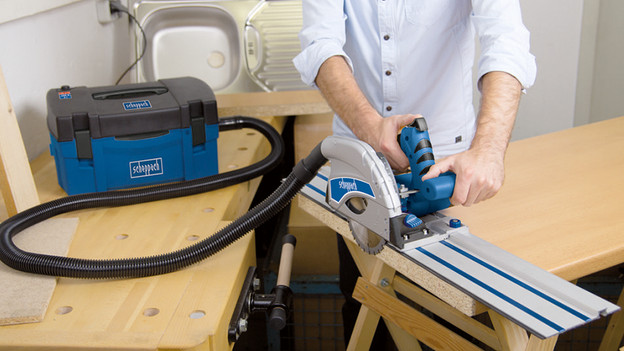
Sawing without clutter
When you use a radial arm saw, it inevitably releases sawdust and dust. Luckily, most radial arm saws have a dust bag and/or allow you to attach your vacuum hose. Keep in mind that some radial arm saws require a vacuum adapter so you can attach your (construction) vacuum. Once properly attached, you get rid of most of the sawdust this way.
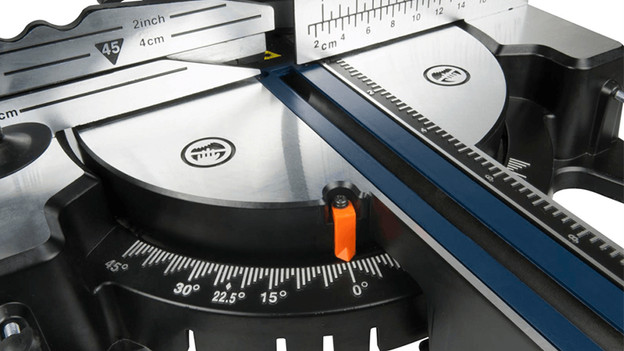
Set the right cutting angle
To get the right cutting result, it's essential to set the right cutting angle. To do this, simply rotate the saw head until the scale indicates the right angle. But first, you have to untighten the lock screw. If you want to make miter cuts, tilt the saw head to the left or right until you reach the desired angle. Again, you first have to untighten the screw to do this. Make sure you tighten it properly before you use the saw blade, to prevent it from swiveling.
Article by Marloes
Radial Arm Saw Expert.