
Written by Frank
Edited on
4 May 2023
·
10:13
How do you connect your projector to a Windows PC or laptop?
Yes, you got your new projector. You want to connect your Windows PC to you projector, but how does that work? In this article, I'll give a step-by-step explanation.
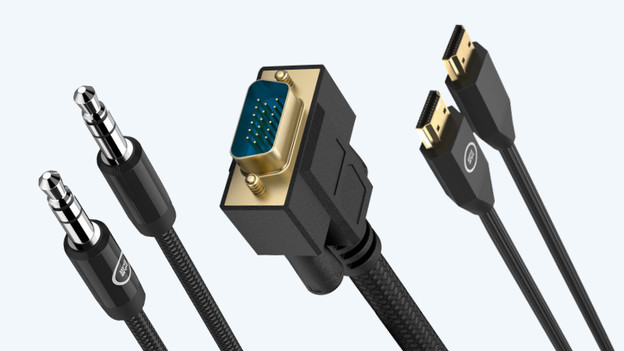
Which cables do you need?
Check which inputs your projector and Windows PC or laptop have. That can be an HDMI, composite video, or VGA input. The composite video cable consists of a red, white, and yellow connector. If your projector and laptop or PC both have an HDMI connector, you can use that for the highest possible quality.
Other accessories you need to connect your projector are:
- The included power cable.
- Audio cable 3.5mm jack (often unnecessary with HDMI).
Step 1: connect your Windows device to the projector
Connect your Windows laptop or PC to the projector with an HDMI, VGA, or composite video cable.
Note:
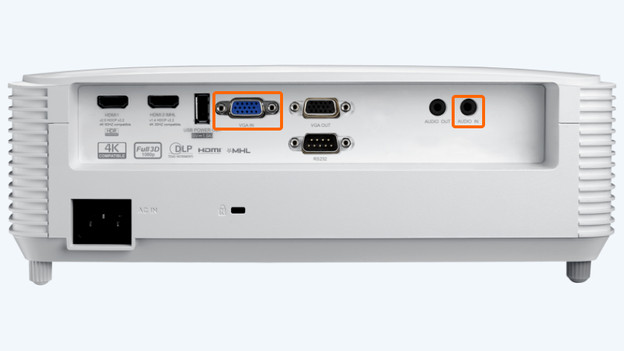
When you connect with a VGA cable, you have to twist the screws on both sides, so the cable is fixed in the connectors.
Optional:
If you want to hear the sound of the device via the speakers of the projector, you can connect the device to the projector with the 3.5mm audio cable. Connect the cable to the AUDIO IN connector of your projector. Do you use an HDMI cable? In that case, the audio cable is often unnecessary.
VGA and AUDIO IN
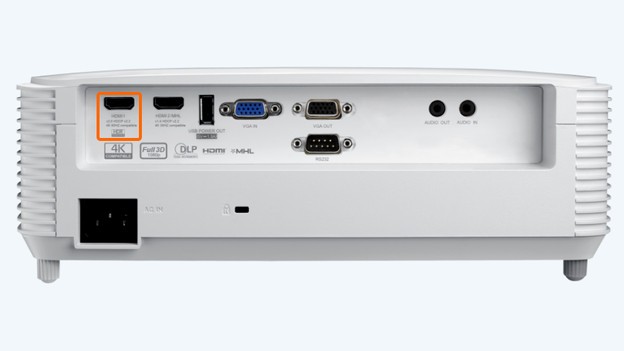
HDMI connector
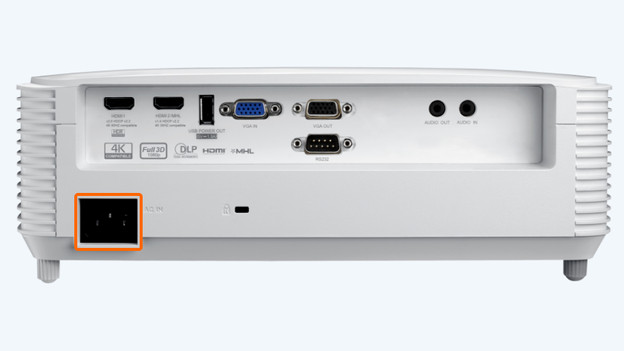
Step 2: connect the power cord to a socket
Connect the projector to a socket. You can do this with the included power cord. The connector for the power cord is often located on the back of the projector. Afterwards, press the power button to turn on the projector. This button is often located on top or on the side of the projector.

Step 3: check whether the connection is successful
Turn on the device that's connected to your projector. You see no image? Check if all the cables are properly connected.
Still don't see any images when you've connected your PC or laptop? Go through the following steps:
- Go to the desktop of your PC or laptop and click the right mouse button.
- Click Display Settings.
- Click detect.
- Go the Multiple displays setting and select Duplicate these displays from the drop-down list.
You're done!
Congratulations, your projector is now successfully connected and ready for use.
Article by Frank
Projector Expert
