Written by Stan
Edited on
21 October 2022
·
10:56
How do you connect devices without an HDMI output to your receiver?
Do you still own old devices without a HDMI connector that you'd like to connect to your receiver? In this article, we'll give you a step-by-step solution on how to connect these devices.
Preparation
The installation will take about 5 minutes per device. Make sure that you're in possession of a component video and composite video cable. A component video or composite video cable is used with older devices in order to transmit image or sound to another device. There are a number of differences between these cables.
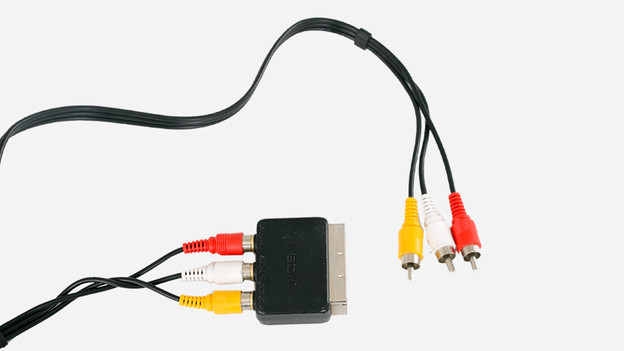
Composite video cable
- A composite video cable consists of a left side and a right side. One side is made up of 3 separate connectors. The other side is made up of either 1 or 3 separate connectors.
- On a composite video cable, the 3 separate connects are yellow, red, and white on both sides. Always conmnect the yellow connector to the yellow port of your receiver. Connect the yellow connector on the other side to the yellow port of your device. Do the same for the colors red and white. If the other side of the cable includes a SCART or proprietary connector, connect this to the relevant port on your device.
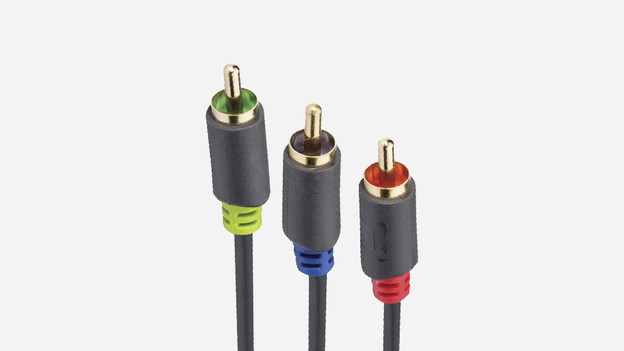
Component video cable
- The component video cable always consists of a left and a right side. One side is made up of 5 separate connectors. The other side is usually made up of another 5 separate connectors. It's also possible that this side features a SCART or proprietary connector.
- Out of the 5 separate connectors, 3 of them are green, blue, and red. These are the cables that transmit images. Always connect the green connector to the green port of your receiver. Connect the green cable on the other side to your device. Do the same for the colors blue and red. If the other side of the cable includes a SCART or proprietary connector, connect this to the relevant port on your device.
- The remaining 2 connectors are red and white. These are the audio connectors. You can connect these connectors to the audio ports of your receiver. This ports should also be red and white.

Connecting a DVD player with a component video input
In this step-by-step guide, we'll use a DVD player as an example.
- Step 1:
Connect the 3 separate connectors of component video cable with the COMPONENT VIDEO IN BD/DVD port of your receiver. Connect the red and white cables of your component video cable to the AUDIO IN BD/DVD ingang.
- Step 2:
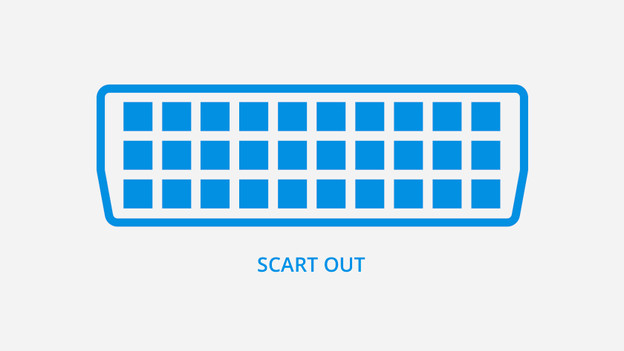
Connect the other side of the component cable to your DVD player. Connect the 3 connectors to the corresponding colors of the VIDEO COMPONENT OUT ports on the DVD player. The red and white connectors must be connected to the AUDIO OUT ports. If this side of the cable feature 1 SCART cable, connect it to the SCART OUT port of your device. If there's a proprietary port, connect it to the corresponding port of your DVD player. Connect the white and red audio connectors to the AUDIO OUT ports of your DVD player.
- Step 3:
Turn on your receiver, DVD player, and TV. The names of each port are listed on the remote control of the receiver. Press the button that says BD/DVD.
- Step 4:
Check whether the DVD menu shows up on your TV. Does the menu not appear? Go through all of the steps again or check whether all of the connectors are connected to their corresponding colors.
Connecting a DVD player with a composite video input
- Step 1:
Connect the yellow cable of your composite video cable with 1 of the VIDEO IN ports on your receiver.
- Step 2:
Connect the red and white cables to 1 of the AUDIO in ports on your receiver. Make sure that the names on the AUDIO IN ports correspond to the name of the VIDEO IN port mentioned in the previous.
- Step 3:
Connect the other side of the composite video cable to your DVD player. You can do this by connecting the 3 connectors to the AUDIO OUT and VIDEO OUT ports. If this side of the cable features 1 SCART connector, connect it to the SCART OUT port of your device. If there's a proprietary port, connect it to the corresponding port of your DVD player
- Step 4:
Turn on your receiver, DVD player, and TV. Zet je receiver, dvd speler en tv aan. The names of each port are listed on the remote control of the receiver. Press the button of the port you're using to connect.
- Step 5:
Check whether the DVD menu shows up on your TV. Does the menu not appear? Go through all of the steps again or check whether all of the connectors are connected to their corresponding colors.
Article by Stan
Audio Expert.